Production technology
What domed stickers are and how they are made
From a printed adhesive base to a clear polymer lens: five production stages, practical quality checks and the details worth knowing before you order.
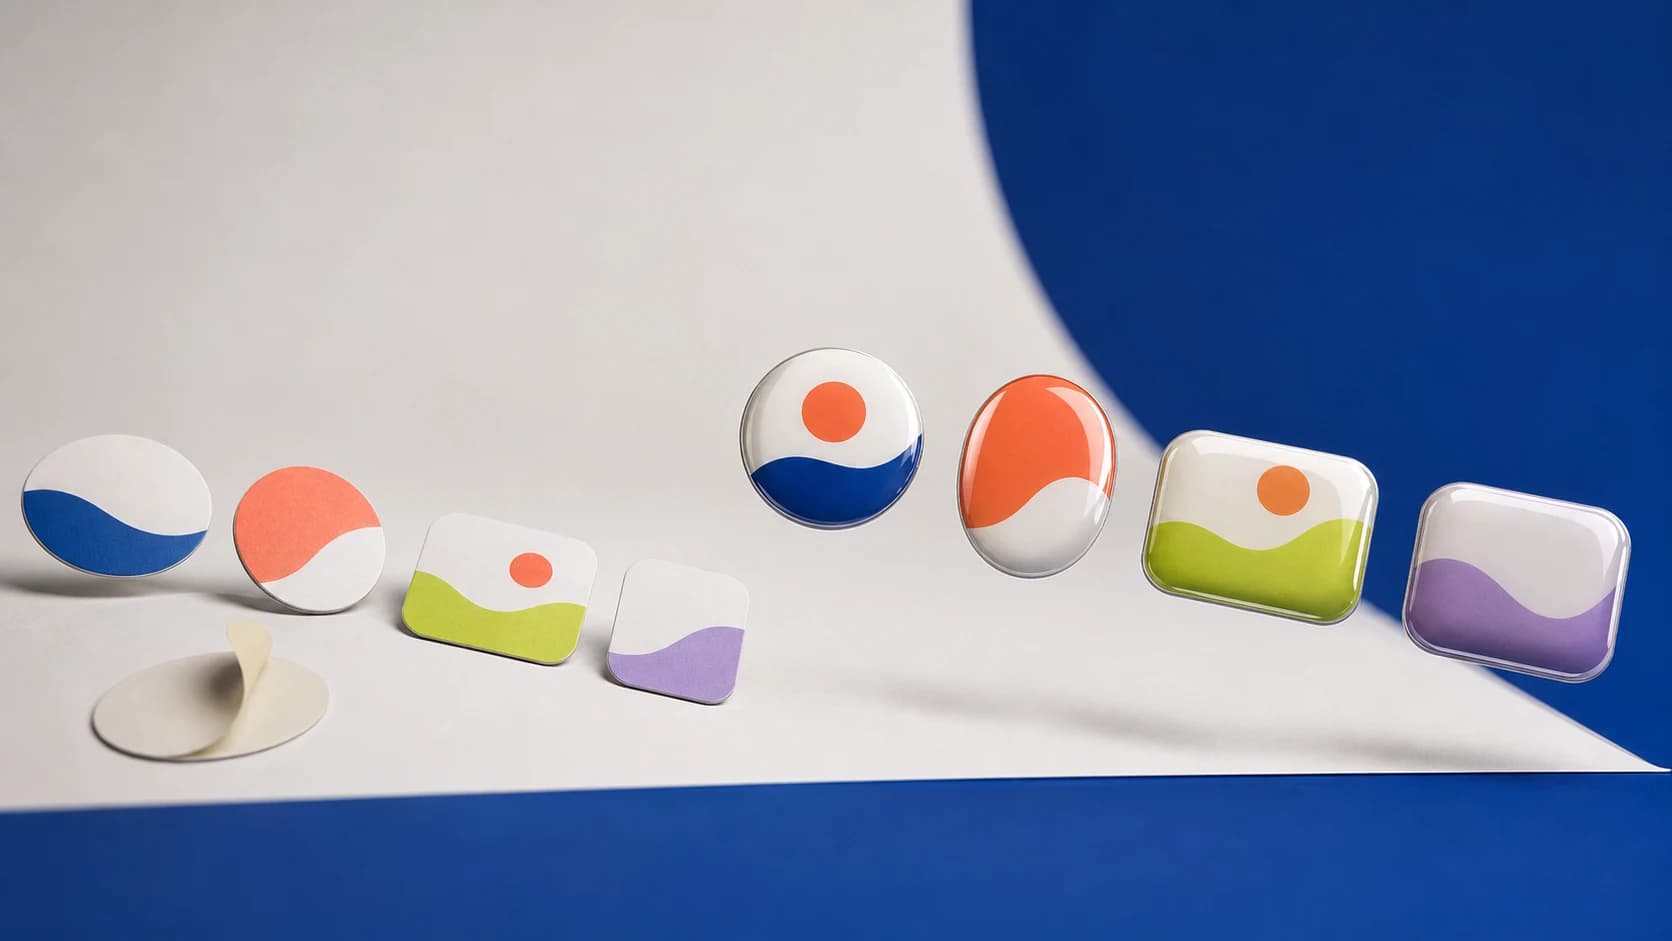
A domed sticker is a printed graphic on a self-adhesive base covered by a clear polymer lens. You may also see it described as a resin sticker, domed label, polymer badge or 3D sticker. The names vary, but the principle is the same: a flat full-colour design receives a clear raised layer that adds depth, gloss and a tactile finish.
Domed stickers are commonly used as compact logos on products and equipment, identification labels, QR codes in customer-facing spaces, branded packaging details and accents on corporate gifts. They are not a replacement for an engraved metal rating plate, but they work well when full-colour printing, low weight, an adhesive backing and a distinctive finish matter.
The volume is not drawn into the artwork. It appears when precise print receives an even, transparent polymer lens.
The principle behind a domed sticker
What a domed sticker is made of
A finished sticker combines three functional layers. The first is the adhesive that bonds to a clean, even surface. The second is the printed film carrying the logo, text, number or QR code. The third is the clear polymer dome. It refracts light, makes colours appear richer and gives the print an additional barrier against moisture, abrasion and minor scratches.
How domed stickers are made in five stages
A repeatable result depends on the complete sequence rather than one visually impressive step. An error in the size, cutting path or print will not disappear under the transparent dome; the lens is more likely to make it easier to notice.
- Artwork preparation
The shape, exact dimensions and quantity are defined first. A logo or image is positioned inside the cutting path, while margins, small text and legibility are checked at actual size. If no print-ready artwork exists, it can be assembled in the online editor or prepared by a designer.
- Printing on adhesive film
The approved image is printed on self-adhesive film. This stage determines the colour, contrast and sharpness of the final label. A clear dome enhances the finish, but it cannot restore a pixelated source or make tiny lettering readable by itself.
- Contour cutting
A plotter cuts circles, ovals, rounded squares, rectangles or an approved custom outline. Smooth paths and rounded corners are better suited to doming because the liquid material can form an even lens and remain within the edge of the piece.
- Applying the polymer resin
A measured amount of clear two-part polymer is dispensed onto every cut piece. Surface tension draws it towards the edge and forms the raised lens. Accurate dosing, a level surface, dust control and bubble prevention are essential at this stage.
- Curing, inspection and packing
The coated pieces remain undisturbed until the polymer has fully cured. A typical production cycle takes about a day, although the exact time depends on the material and process. The dome, edge, colour, cleanliness and quantity are then checked before packing.
What makes a domed label look well made
You can assess the finish without specialist equipment. View the sticker under side lighting: the lens should be even and free of dust, craters and obvious bubbles. Its edge should follow the intended shape and the print should remain sharp. If dome height or colour changes noticeably from one item to another, the production run is not consistent.
- an even, transparent lens without waves or cloudiness;
- a clean edge with no polymer escaping beyond the outline;
- a legible logo, line of text or QR code at actual size;
- consistent shape and colour across the complete run;
- an adhesive backing suited to a clean, smooth application surface.
Why not every shape is suitable for resin doming
Liquid polymer naturally tries to form a smooth lens. Very sharp corners, thin spikes, narrow bridges and intricate miniature outlines make an even dome more difficult to achieve. A custom badge is therefore often simplified slightly: corners are rounded, minimum gaps are increased and details that would disappear at the final size are removed.
Can you make a domed sticker at home?
It is possible to coat a single decorative piece with resin by hand. Producing a repeatable batch is a different task. The same dome height must be recreated dozens or hundreds of times, while dust and bubbles are controlled, edges remain clean and chemical components are handled according to the manufacturer’s safety instructions. Process control, rather than simply having resin available, separates predictable production from a home experiment.
Where polymer domed stickers are used
- logos on coffee, retail, office and household equipment;
- branding on products, enclosures, boxes and reusable packaging;
- QR codes for menus, payment, instructions, warranties or reordering;
- corporate gifts, power banks, travel mugs, notebooks and promotional items;
- compact information labels that benefit from full-colour printing.
Before application, the surface should be free of dust, grease and moisture. Pressure-sensitive adhesive performs best on a smooth, stable substrate. Heavily textured, dusty or damp surfaces and some low-surface-energy plastics may require a separate test; a sample applied to the real material is more reliable than a broad promise.
What to prepare for an accurate order
Five decisions are enough to see the price and preview the result: shape, dimensions, quantity, artwork method and intended use. Shape and dimensions determine area, the quantity determines total material, and the application helps you judge legibility and the suitability of the surface.
- measure the available space on the product in millimetres;
- prepare the highest-quality version of the logo or image you have;
- keep important details away from the cutting edge;
- check small text and QR codes at actual size;
- enter the required quantity—the calculator will suggest more units when the minimum order value remains unchanged.
The best artwork is not the one that looks impressive on a large monitor. It is the one that remains clear on the finished sticker.
A practical pre-production test
In short: from file to finished batch
A domed sticker begins with accurate artwork, is printed on self-adhesive film, contour-cut, coated with a measured layer of clear polymer, cured and inspected. The result is a compact raised branding element ready to be applied to a product, a piece of equipment or a promotional item.
How it looks

